Deploying a Rails app to an EC2 instance (part 1)
When I first learned Rails, after working with plain old Ruby for about a year, my plan was to do some freelance web development work with a more experienced friend. We’ll call him Jon (because that’s his actual name and I don’t think he’ll mind me using it). It didn’t take me very long to feel like I had a decent, albeit rudimentary, understanding of how a web application works: a request comes in, some kind of route mapper looks at the URL and directs the request to a piece of server-side code, that code executes some logic and sets up some data for the view, and the view displays that data to the user. That made enough sense, and I felt like getting the app to do what I wanted was just a matter of writing the right code in the right places.
Writing and running that code locally was straightforward enough, but shockingly, a web server running on my laptop wasn’t much good to one of our clients. Jon had set up websites before, and he would say things like “I’ll go set up the domain” or “I just need to configure Nginx,” and I would try to ask what those things meant, but…well, let me put it this way. Pretend you want to buy a house, which I do, and which is a very time- and energy-consuming process, which is why it has somehow found its way into a blog post about web servers. Anyway, your realtor tells you about a great house that just came on the market and tries to describe it to you. It has two bedrooms, good views, lots of natural light, and several nice little balconies. Perfect, you think! But it turns out the house looks like this:

The point is that you have to go see the house yourself. Even looking at pictures doesn’t give you the whole…well…picture.
I learn best by doing things, and reading documentation - or even watching other people work - only gets you so far. Since those days working with Jon, I’ve had plenty of opportunities to provision and deploy servers in AWS, configure DNS records, set up databases, and do many more of the things he used to manage that always seemed like a mystery to me. But until pretty recently, I still felt like there was something missing: I had never actually set up a website from scratch by myself. I could have just set up a trivial app somewhere to try it out, but I never got around to it. Last year, though, I was taking a Coursera course on cybersecurity, and the final project involved creating a simple messaging application that was deployed to a place where my peers could test (i.e. try to hack) it. The easy solution would have been to just deploy it to Heroku, but I thought, why not take this opportunity to set up and host my own site? So I did, and I learned some things, and now I’m writing them down in the hopes that someone else learns some things as well.
Setting up the app
Let’s just create a very simple Rails app. It doesn’t really matter what it does as long as we can verify that it’s working. You can also use something other than Rails if you prefer; it doesn’t really matter for our goals here. I’ll show some of the code, but you can also view it on Github.
$ rvm use ruby-2.7.2
$ rails new deploy-me --database=postgresql
I’ll configure config/database.yml to look like this:
# config/database.yml

default: &default
  adapter: postgresql
  encoding: unicode
  pool: <%= ENV.fetch("RAILS_MAX_THREADS") { 5 } %>
  host: <%= ENV['DB_HOST'] %>
  database: <%= ENV['DB_NAME'] %>
  username: <%= ENV['DB_USERNAME'] %>
  password: <%= ENV['DB_PASSWORD'] %>
  port: <%= ENV['DB_PORT'] || 5432 %>
And then I’ll add the dotenv gem and set up a .env file with my local database credentials.
Now let’s create a very basic controller and view:
$ bundle exec rails g controller hello
# app/controllers/hello_controller.rb

class HelloController < ApplicationController
  def hello
  end
end
<%- # app/views/hello/hello.html.erb -%>
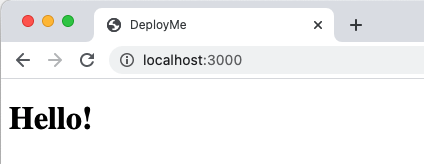
<h1>Hello!</h1>
And the routes file:
# config/routes.rb

Rails.application.routes.draw do
  root 'hello#hello'
end
Now let’s start it up and confirm it’s working:
$ bundle exec rails s
And check it out in the browser:
Adding a model
Let’s just add a very simple model to make sure our application is connecting to the database:
$ bundle exec rails g model post title:text body:text
# app/models/post.rb

class Post < ApplicationRecord
  validates_presence_of :title, :body
end
# db/migrate/20210424214510_create_posts.rb

class CreatePosts < ActiveRecord::Migration[5.2]
  def change
    create_table :posts do |t|
      t.text :title
      t.text :body

      t.timestamps
    end
  end
end
Now migrate:
$ bundle exec rails db:migrate
Let’s create a simple post and retrieve it in our controller:
$ bundle exec rails c
2.7.2 :001 > Post.create! title: 'first post', body: 'this is a test'
# app/controllers/hello_controller.rb

class HelloController < ApplicationController
  def hello
    @post = Post.first
  end
end
<%- # app/views/hello/hello.html.erb -%>
<h1>Hello</h1>
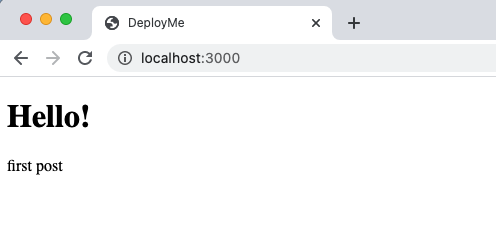
<%= @post.title %>
Let’s make sure it works:
Setting up the infrastructure
Great! Now we have a working app. Let’s go set up some infrastructure in AWS to deploy it. This is going to be a very basic, manual deployment setup because I think it’s the best way to understand how the various pieces fit together. We’ll set up an EC2 instance, clone the repo containing our project, and start up the web server in production mode using systemd, the Linux service manager.
Let’s set up the EC2 instance first:
- Log into the AWS console
- Go to EC2
- Click “Launch Instances”
- Choose your desired OS / AMI. I’ll use Ubuntu 18.04, which is one of the available free tier options.
- Choose an instance type. If you want free tier, you’ll probably need t2.micro.
- Click “Next: Configure Instance Details”
- Make sure “Auto-assign Public IP” is set to enable (either explicitly or via the subnet setting)
- Click “Next: Add Storage”
- Under Encryption, choose the default aws/kms key. It’s good practice to encrypt the root volume, even though it doesn’t really matter for this project. The rest of the default settings (8 GiB SSD) should be fine.
- Click “Next: Add Tags”
- Add a tag with the key “Name” and a value of whatever name you want to assign to your instance so you can recognize it easily in the dashboard.
- Click “Next: Configure Security Group”
- Give your security group a more friendly name than “launch-wizard-1” (or whatever gets auto-filled). Maybe something like “rails-web-sg”
- By default, there is a rule to allow inbound SSH traffic (TCP on port 22) from any IP address (0.0.0.0/0). Let’s change the source of that traffic to just “My IP” for added security. It should auto-fill your current IP address, but you can also just Google “what is my ip” and enter the value. Make sure the prefix size (the number after the slash) is 32 so it specifies an exact IP address rather than a range (cidr.xyz is a good resource for understanding CIDR blocks).
- We also need to allow web traffic if we want to access our site. Let’s add rules to allow HTTP (TCP on port 80) and HTTPS (TCP on port 443) traffic from any IP address (source 0.0.0.0/0, ::/0).
- Click “Review and Launch”
- Review the details and click “Launch”
- You will be prompted to choose an SSH key pair or create a new one. Let’s create a new one just to show the process.
- enter a name for the key pair. I’ll choose “andrew2”
- click “Download Key Pair” and save the file
- move the file to a safe location. I have a directory called
.sshinside my user home directory:$ mv ~/Downloads/andrew2.pem ~/.ssh/aws-personal-2.pem
- Click “Launch Instances”
- Click “View Instances” to go back to the dashboard
Connecting to the instance
Once the instance is set up, we can connect and pull down our code. We’ll need the local path to the key file we saved previously and the public IP or DNS address of the instance we just created. If you select the instance in the EC2 dashboard and click “Connect,” then choose “SSH client,” it will show you an example SSH command. Let’s try to connect:
$ ssh -i ~/.ssh/aws-personal-2.pem ubuntu@3.141.2.247
The authenticity of host '3.141.2.247 (3.141.2.247)' can't be established.
ECDSA key fingerprint is SHA256:<some-hash>.
Are you sure you want to continue connecting (yes/no/[fingerprint])? yes
Warning: Permanently added '3.141.2.247' (ECDSA) to the list of known hosts.
@@@@@@@@@@@@@@@@@@@@@@@@@@@@@@@@@@@@@@@@@@@@@@@@@@@@@@@@@@@
@         WARNING: UNPROTECTED PRIVATE KEY FILE!          @
@@@@@@@@@@@@@@@@@@@@@@@@@@@@@@@@@@@@@@@@@@@@@@@@@@@@@@@@@@@
Permissions 0644 for '/Users/andrewweinstein/.ssh/aws-personal-2.pem' are too open.
It is required that your private key files are NOT accessible by others.
This private key will be ignored.
Load key "/Users/andrewweinstein/.ssh/aws-personal-2.pem": bad permissions
ubuntu@3.141.2.247: Permission denied (publickey).
Oops! I do this almost every time I set up a new SSH key. The error message here is pretty clear, so let’s fix the permissions and try again:
$ chmod 400 ~/.ssh/aws-personal-2.pem
$ ssh -i ~/.ssh/aws-personal-2.pem ubuntu@3.141.2.247
Welcome to Ubuntu 18.04.5 LTS (GNU/Linux 5.4.0-1038-aws x86_64)

ubuntu@ip-172-31-2-249:~$
Great, we’re in!

Cloning the repo
This EC2 instance is going to be our web server, which means it needs to have our code somewhere on it.
First, let’s update packages and repositories:
ubuntu@ip-172-31-2-249:~$ sudo apt-get update
Then let’s create a directory for our project and grant ownership to the ubuntu user:
ubuntu@ip-172-31-2-249:~$ sudo mkdir -p /srv/www
ubuntu@ip-172-31-2-249:~$ sudo chown -R ubuntu /srv/www
Now, in order to clone the project, we’ll either need to use HTTPS and enter our Github credentials every time we pull down updates, or we’ll need to set up a deploy key. That sounds like less of a hassle, so let’s do that. We first need to generate a key on the server (I won’t use a passphrase here, but you can):
ubuntu@ip-172-31-2-249:~$ ssh-keygen -t ed25519 -C "your-github-email@example.com"
Generating public/private ed25519 key pair.
Enter file in which to save the key (/home/ubuntu/.ssh/id_ed25519): /home/ubuntu/.ssh/github_key
Enter passphrase (empty for no passphrase):
Enter same passphrase again:
Your identification has been saved in /home/ubuntu/.ssh/github_key.
Your public key has been saved in /home/ubuntu/.ssh/github_key.pub.
Once you’ve generated the key, copy the contents of the github_key.pub file. In Github, go to your repository -> settings -> deploy keys and paste in the contents of that public key file:
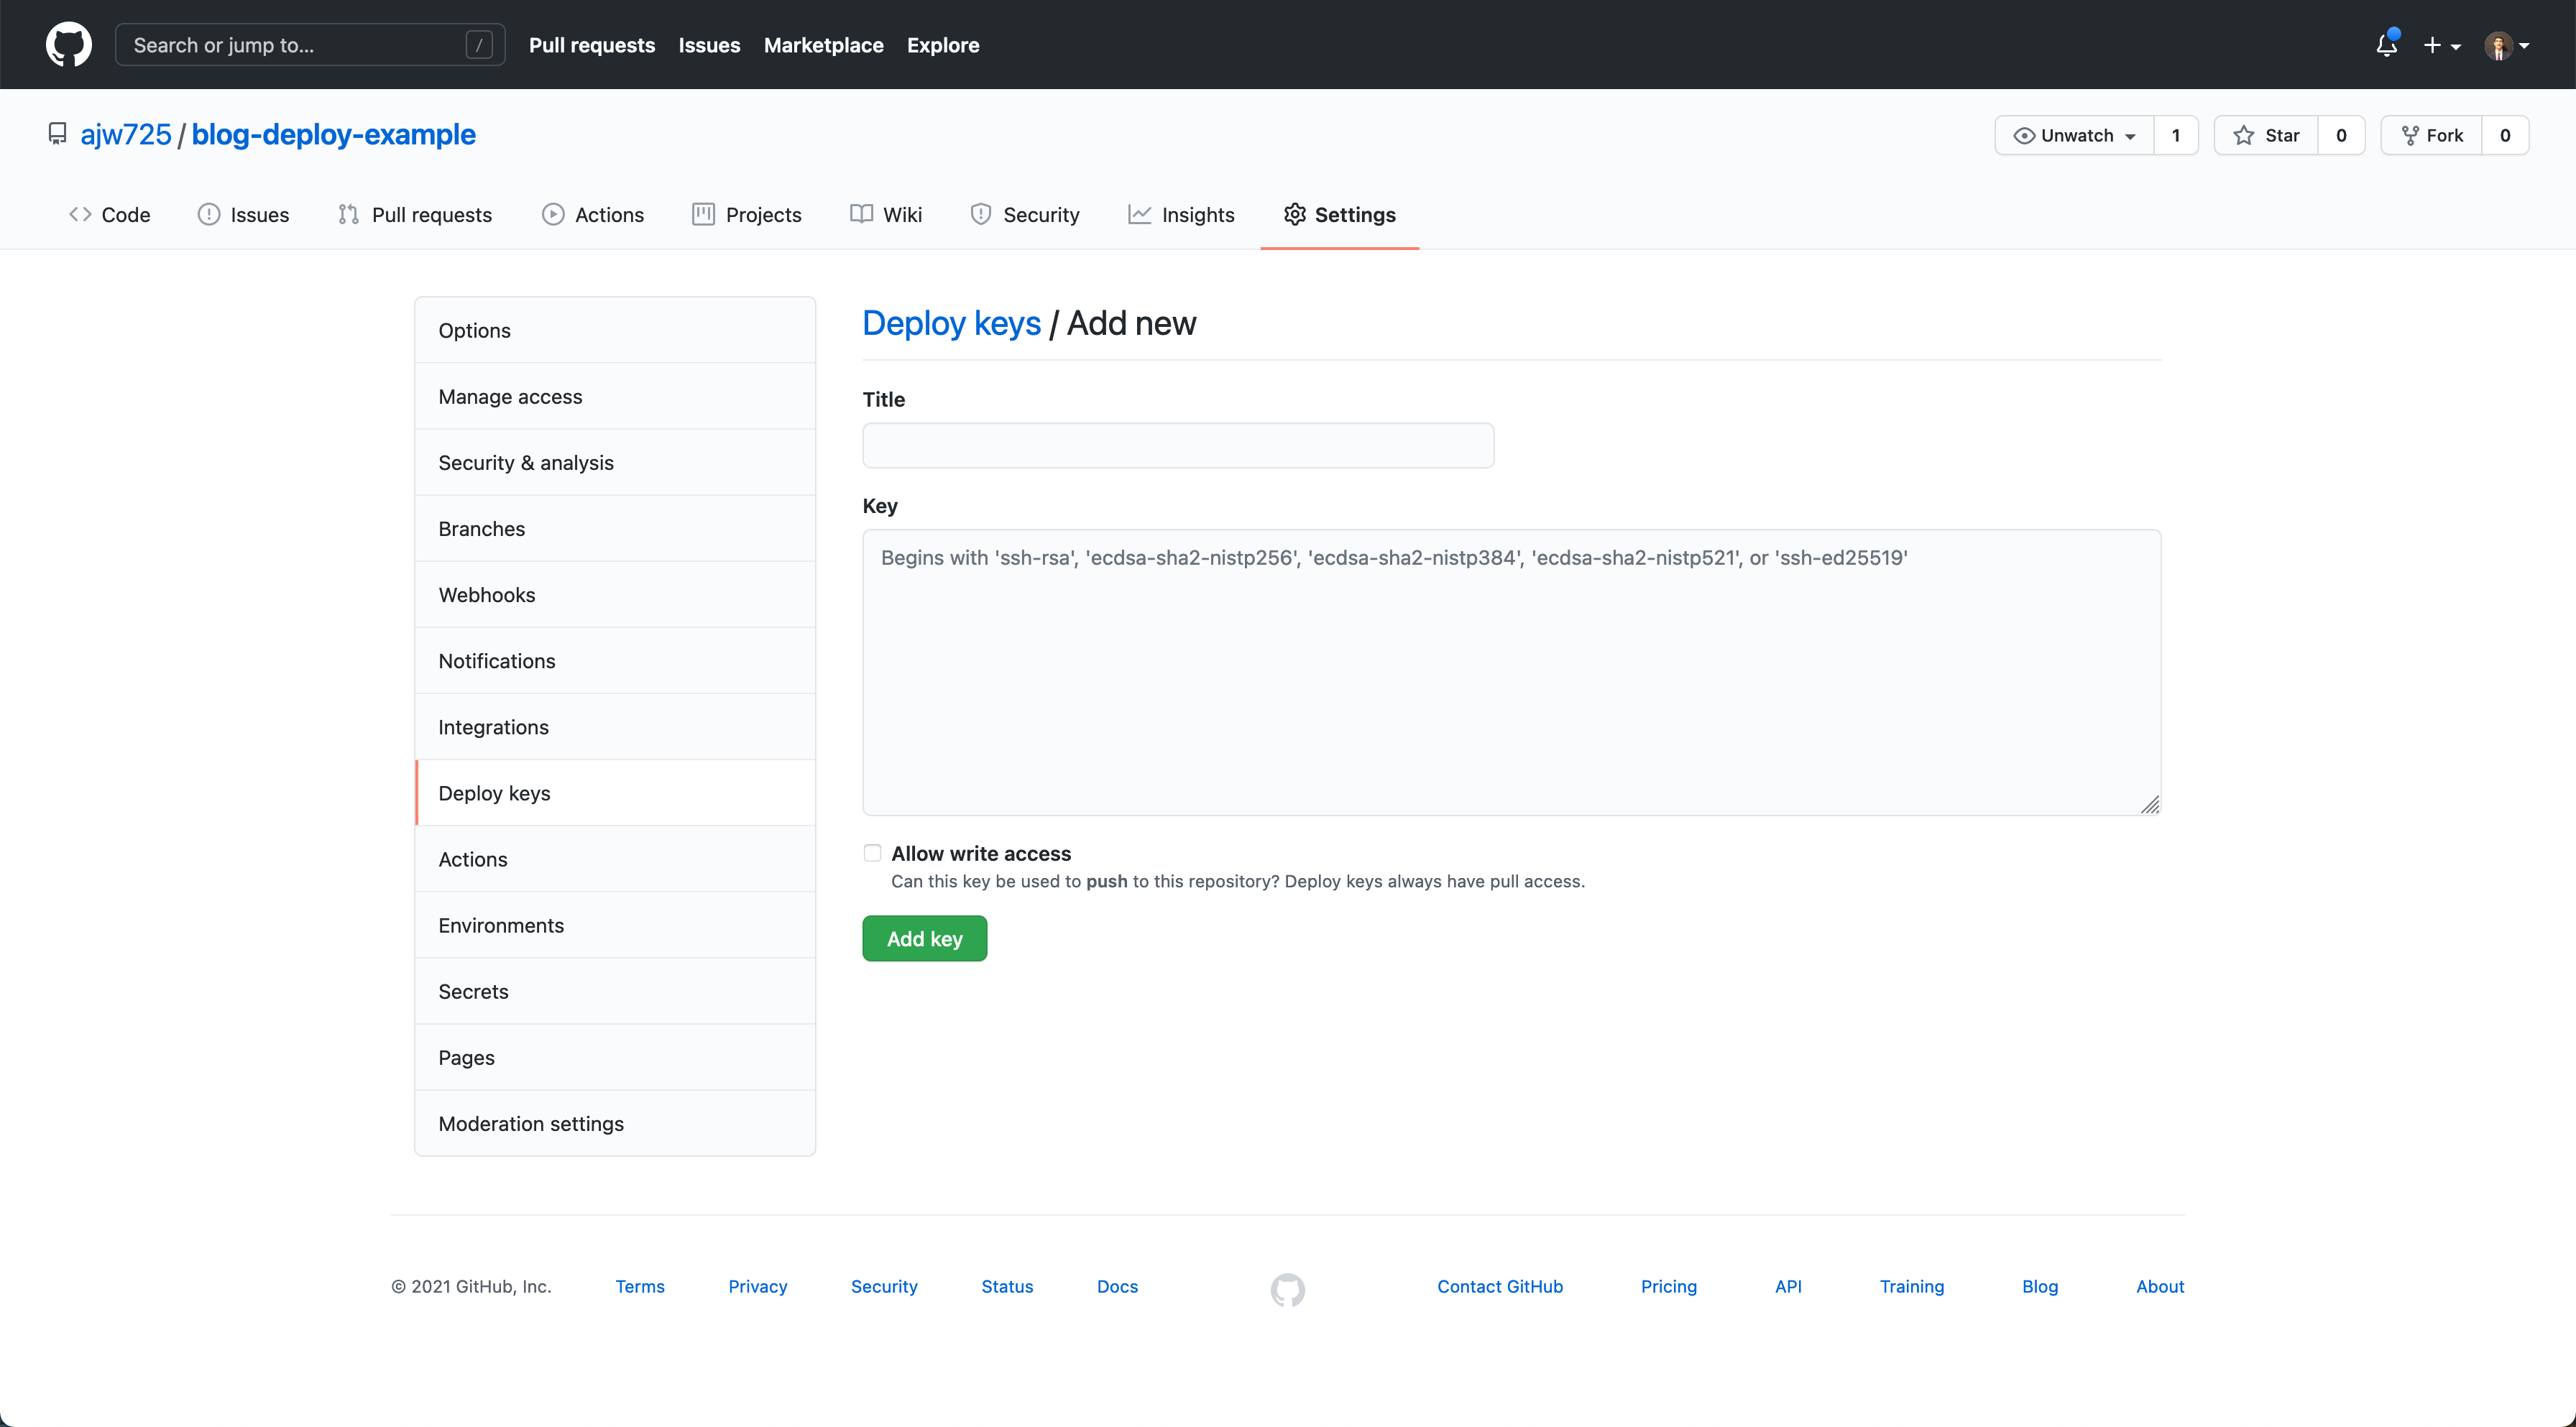
Don’t allow write access; we just need to be able to read to pull code down to the server.
Now we can add the key to the SSH agent:
ubuntu@ip-172-31-2-249:~$ ssh-add ~/.ssh/github_key
Could not open a connection to your authentication agent.
Oops! We forgot to start ssh-agent. It would be nice for this to happen automatically each time we log in, so let’s add it to our ~/.bash_profile:
# ~/.bash_profile

eval "$(ssh-agent -s)"
Then source it and try again:
ubuntu@ip-172-31-2-249:~$ source ~/.bash_profile
Agent pid 2474
ubuntu@ip-172-31-2-249:~$ ssh-add ~/.ssh/github_key
Identity added: /home/ubuntu/.ssh/github_key (your-email)
It would also be nice if this key got added to the agent each time the server rebooted. We can accomplish this by creating an SSH config file:
# ~/.ssh/config

Host *
  AddKeysToAgent yes
  IdentityFile ~/.ssh/github_key
Now let’s clone our repo:
ubuntu@ip-172-31-2-249:~$ cd /srv/www
ubuntu@ip-172-31-2-249:/srv/www$ git clone git@github.com:ajw725/blog-deploy-example.git app
Cloning into 'app'...
The authenticity of host 'github.com (140.82.114.4)' can't be established.
RSA key fingerprint is SHA256:<some-hash>.
Are you sure you want to continue connecting (yes/no)? yes
Warning: Permanently added 'github.com,140.82.114.4' (RSA) to the list of known hosts.
remote: Enumerating objects: 101, done.
remote: Counting objects: 100% (101/101), done.
remote: Compressing objects: 100% (78/78), done.
remote: Total 101 (delta 7), reused 100 (delta 6), pack-reused 0
Receiving objects: 100% (101/101), 23.08 KiB | 4.62 MiB/s, done.
Resolving deltas: 100% (7/7), done.
And then install dependencies:
ubuntu@ip-172-31-2-249:/srv/www$ cd app
ubuntu@ip-172-31-2-249:/srv/www/app$ bundle install --without development test

Command 'bundle' not found, but can be installed with:

sudo snap install ruby          # version 3.0.1, or
sudo apt  install ruby-bundler

See 'snap info ruby' for additional versions.
Oops! We forgot to install Ruby. Let’s do that first. We’ll use RVM to make sure we get the version we want, following the security instructions to verify the signature of the package. Installing RVM:
ubuntu@ip-172-31-2-249:/srv/www/app$ gpg --keyserver hkp://pool.sks-keyservers.net --recv-keys 409B6B1796C275462A1703113804BB82D39DC0E3 7D2BAF1CF37B13E2069D6956105BD0E739499BDB
ubuntu@ip-172-31-2-249:/srv/www/app$ echo 409B6B1796C275462A1703113804BB82D39DC0E3:6: | gpg2 --import-ownertrust # mpapis@gmail.com
ubuntu@ip-172-31-2-249:/srv/www/app$ echo 7D2BAF1CF37B13E2069D6956105BD0E739499BDB:6: | gpg2 --import-ownertrust # piotr.kuczynski@gmail.com
ubuntu@ip-172-31-2-249:/srv/www/app$ curl -sSL https://get.rvm.io | bash -s stable
ubuntu@ip-172-31-2-249:/srv/www/app$ source ~/.rvm/scripts/rvm
And then installing Ruby:
ubuntu@ip-172-31-2-249:/srv/www/app$ rvm install ruby-2.7.2
ubuntu@ip-172-31-2-249:/srv/www/app$ ruby -v
ruby 2.7.2p137 (2020-10-01 revision 5445e04352) [x86_64-linux]
Great! Now we can install our dependencies:
ubuntu@ip-172-31-2-249:/srv/www/app$ bundle install --without development test
[...]
An error occurred while installing pg (1.2.3), and Bundler cannot continue.
Make sure that `gem install pg -v '1.2.3' --source 'https://rubygems.org/'` succeeds before bundling.
[...]
Darn. Looks like we have some missing dependencies for the pg gem. While it’s not obvious, what we need to install is the libpq-dev package. We also haven’t really talked about how we’re going to set up our database. For a real website, I’d set it up in RDS, but for this tutorial, we can just install and run it right on this same EC2 instance. So let’s install both that missing dependency and PostgreSQL itself:
ubuntu@ip-172-31-2-249:/srv/www/app$ sudo apt-get install -y postgresql libpq-dev
Now we can bundle install and it should finish successfully.
Setting up the database
Now that everything is installed, we can focus on getting it up and running. We’ll need to start PostgreSQL, which we can do with systemd:
ubuntu@ip-172-31-2-249:/srv/www/app$ sudo service postgresql start
ubuntu@ip-172-31-2-249:/srv/www/app$ sudo service postgresql status
● postgresql.service - PostgreSQL RDBMS
   Loaded: loaded (/lib/systemd/system/postgresql.service; enabled; vendor preset: enabled)
   Active: active (exited) since Sat 2021-04-24 16:00:12 UTC; 3min 18s ago
 Main PID: 21535 (code=exited, status=0/SUCCESS)
    Tasks: 0 (limit: 1140)
   CGroup: /system.slice/postgresql.service

Apr 24 16:00:12 ip-172-31-2-249 systemd[1]: Starting PostgreSQL RDBMS...
Apr 24 16:00:12 ip-172-31-2-249 systemd[1]: Started PostgreSQL RDBMS.
Now let’s set up a Postgres user for our application. When we installed PostgreSQL, it created a postgres user both on the operating system and in Postgres itself. The Postgres user doesn’t have a password; it’s set up for authentication via ident, which just means that you can only connect as the OS user of the same name. So we need to switch to the postgres user and then connect to the database, and then we can create a different database user for our application, assigning a username and password that we’ll set as our DB_USERNAME and DB_PASSWORD environment variables. We can either allow the new user to create databases or manually create the application database as postgres. I’ll just do the former for now:
ubuntu@ip-172-31-2-249:/srv/www/app$ sudo su postgres
postgres@ip-172-31-2-249:/srv/www/app$ psql
psql (10.16 (Ubuntu 10.16-0ubuntu0.18.04.1))
Type "help" for help.

postgres=# CREATE ROLE rails WITH LOGIN PASSWORD 'some-random-string';
CREATE ROLE
postgres=# ALTER USER rails CREATEDB;
ALTER ROLE
Before we can set up our database, we need to set environment variables for the application. We’ll do this slightly differently later, but for now, let’s just set them in our bash profile:
# ~/.bash_profile

export DB_HOST=localhost
export DB_NAME=deploy_me_production
export DB_USER=rails
export DB_PASSWORD=your-db-password
Now we can set up the database:
ubuntu@ip-172-31-2-249:/srv/www/app$ source ~/.bash_profile
ubuntu@ip-172-31-2-249:/srv/www/app$ RAILS_ENV=production bundle exec rails db:create
rails aborted!
ExecJS::RuntimeUnavailable: Could not find a JavaScript runtime. See https://github.com/rails/execjs for a list of available runtimes.
Oops! Turns out Rails 6 needs a JS runtime. We can install NodeJS:
ubuntu@ip-172-31-2-249:/srv/www/app$ sudo apt-get install -y nodejs
Now let’s try the database again:
ubuntu@ip-172-31-2-249:/srv/www/app$ RAILS_ENV=production bundle exec rails db:create
rails aborted!
ArgumentError: Missing `secret_key_base` for 'production' environment, set this string with `rails credentials:edit`
Huh. Well, we can fix that too:
ubuntu@ip-172-31-2-249:/srv/www/app$ bundle exec rails credentials:edit
[...]
/home/ubuntu/.rvm/gems/ruby-2.7.2/gems/activesupport-5.2.5/lib/active_support/message_encryptor.rb:201:in `final': OpenSSL::Cipher::CipherError
[...]
/home/ubuntu/.rvm/gems/ruby-2.7.2/gems/activesupport-5.2.5/lib/active_support/message_encryptor.rb:206:in `rescue in _decrypt': ActiveSupport::MessageEncryptor::InvalidMessage (ActiveSupport::MessageEncryptor::InvalidMessage)
Hmm…looks like our credentials encryption got a little scrambled somehow. Fortunately, we’re not too far along, so we can just wipe and recreate it locally:
andrewweinstein::~/repos/personal/deploy-me [main] % rm config/credentials.yml.enc config/master.key
andrewweinstein::~/repos/personal/deploy-me [main] % bundle exec rails credentials:edit
Adding config/master.key to store the master encryption key: your-new-key-here
Add, commit, and push the changes, pull them down to the server, then copy that new key value and save it as config/master.key on the server. Now let’s try the database one more time:
ubuntu@ip-172-31-2-249:/srv/www/app$ RAILS_ENV=production bundle exec rails db:create
Created database 'deploy_me_production'
ubuntu@ip-172-31-2-249:/srv/www/app$ RAILS_ENV=production bundle exec rails db:migrate
Finally! Now let’s make sure the application can connect to the database and create a test post:
ubuntu@ip-172-31-2-249:/srv/www/app$ RAILS_ENV=production bundle exec rails c
Loading production environment (Rails 5.2.5)
2.7.2 :001 > Post.create! title: 'first post', body: 'testing'
   (0.2ms)  BEGIN
  Post Create (0.5ms)  INSERT INTO "posts" ("title", "body", "created_at", "updated_at") VALUES ($1, $2, $3, $4) RETURNING "id"  [["title", "first post"], ["body", "testing"], ["created_at", "2021-04-24 21:56:15.405088"], ["updated_at", "2021-04-24 21:56:15.405088"]]
   (0.9ms)  COMMIT
 => #<Post id: 1, title: "first post", body: "testing", created_at: "2021-04-24 21:56:15", updated_at: "2021-04-24 21:56:15">
Looks like we’re good to go!
Running the application
We’ll use Puma as our web server in production and manage it with systemd. To do this, we’ll need to set up a systemd unit file for the service definition:
# /etc/systemd/system/puma.service

[Unit]
Description=Puma HTTP Server Accepts Sockets
After=network.target
Requires=puma.socket

[Service]
Type=simple
User=ubuntu
WorkingDirectory=/srv/www/app
PIDFile=/srv/www/app/puma/tmp/pids/puma.pid
EnvironmentFile=/etc/systemd/system/puma.service.d/env.conf
ExecStart=/home/ubuntu/.rvm/gems/ruby-2.7.2/wrappers/puma -C /srv/www/app/config/puma.rb
Restart=always
RestartSec=10

[Install]
WantedBy=multi-user.target
The service runs as the ubuntu user in our Rails root directory, and it starts up Puma using our application config file using an executable wrapper generated by RVM. There are also two other files referenced from this unit file that we’ll need to create. The first is the socket file, which is required in the unit definition. This isn’t strictly necessary, but we’re setting this up to use socket activation, which means that systemd opens up sockets first and passes them to Puma when it starts, instead of Puma just doing this itself. This allows for graceful restarts. The socket file:
# /etc/systemd/system/puma.socket

[Unit]
Description=Puma HTTP Server Accepts Sockets

[Socket]
SocketUser=ubuntu
ListenStream=0.0.0.0:3000

NoDelay=true
ReusePort=true
Backlog=1024

[Install]
WantedBy=sockets.target
The other file we’re referencing is the EnvironmentFile, which is where we’ll set the environment variables our application needs to run:
# /etc/systemd/system/puma.service.d/env.conf

[Service]
Environment="RAILS_ENV=production"
Environment="DB_HOST=localhost"
Environment="DB_NAME=deploy_me_production"
Environment="DB_USERNAME=rails"
Environment="DB_PASSWORD=your-db-password"
We also need to make sure our Puma config file is set up correctly and binding to the right port:
# config/puma.rb

threads_count = ENV.fetch('RAILS_MAX_THREADS', 5)
threads threads_count, threads_count
server_port = ENV.fetch('PORT', 3000)
bind "tcp://0.0.0.0:#{server_port}"
environment ENV.fetch('RAILS_ENV', 'development')
pidfile ENV.fetch('PIDFILE', 'tmp/pids/server.pid')
workers ENV.fetch('WEB_CONCURRENCY', 2)
preload_app!
plugin :tmp_restart
Now we can reload systemd, enable our new socket and service, and run them:
ubuntu@ip-172-31-2-249:/srv/www/app$ sudo systemctl daemon-reload
ubuntu@ip-172-31-2-249:/srv/www/app$ sudo systemctl enable puma.service puma.socket
ubuntu@ip-172-31-2-249:/srv/www/app$ sudo systemctl start puma.socket
ubuntu@ip-172-31-2-249:/srv/www/app$ sudo service puma start
ubuntu@ip-172-31-2-249:/srv/www/app$ sudo service puma status
● puma.service - Puma HTTP Server
   Loaded: loaded (/etc/systemd/system/puma.service; enabled; vendor preset: enabled)
  Drop-In: /etc/systemd/system/puma.service.d
           └─env.conf
   Active: active (running) since Sat 2021-04-24 18:03:55 UTC; 1min 22s ago
 Main PID: 28657 (ruby)
    Tasks: 27 (limit: 1140)
   CGroup: /system.slice/puma.service
           ├─28657 puma 3.12.6 (tcp://0.0.0.0:3000) [app]
           ├─28678 puma: cluster worker 0: 28657 [app]
           └─28679 puma: cluster worker 1: 28657 [app]

Apr 24 18:03:55 ip-172-31-2-249 puma[28657]: [28657] * Min threads: 5, max threads: 5
Apr 24 18:03:55 ip-172-31-2-249 puma[28657]: [28657] * Environment: production
Apr 24 18:03:55 ip-172-31-2-249 puma[28657]: [28657] * Process workers: 2
Apr 24 18:03:55 ip-172-31-2-249 puma[28657]: [28657] * Preloading application
Apr 24 18:03:56 ip-172-31-2-249 puma[28657]: [28657] * Activated tcp://0.0.0.0:3000
Apr 24 18:03:56 ip-172-31-2-249 puma[28657]: [28657] ! WARNING: Detected 1 Thread(s) started in app boot:
Apr 24 18:03:56 ip-172-31-2-249 puma[28657]: [28657] ! #<Thread:0x0000559711af7848 /home/ubuntu/.rvm/gems/ruby-2.7.2/gems/activerecord-
Apr 24 18:03:56 ip-172-31-2-249 puma[28657]: [28657] Use Ctrl-C to stop
Apr 24 18:03:56 ip-172-31-2-249 puma[28657]: [28657] - Worker 1 (pid: 28679) booted, phase: 0
Apr 24 18:03:56 ip-172-31-2-249 puma[28657]: [28657] - Worker 0 (pid: 28678) booted, phase: 0
OK, great! Now our Rails app is all configured and the Puma server is running. When it’s time to make changes to the code, we can modify it locally, push it to Github, pull it down to the EC2 instance, and restart Puma:
ubuntu@ip-172-31-2-249:/srv/www/app$ sudo service puma restart
We now have a working application and a deployment pipeline. We’re off to the races!

Setting up Nginx
Well, our application might be running, but we can’t access it yet. We need a web server. Nginx is a good choice because it’s fast and does a whole bunch of useful things like caching, serving static files, and more. Let’s install it:
ubuntu@ip-172-31-2-249:/srv/www/app$ sudo apt-get install -y nginx
We need to set up an Nginx configuration file for our site. There is a default file at /etc/nginx/nginx.conf that includes all virtual host configs set up within the /etc/nginx/sites-enabled directory, so we can just create a new file for our application in there. There’s actually a default file present already, but we’ll remove it first and just create our own very basic config file for now:
ubuntu@ip-172-31-2-249:/srv/www/app$ sudo rm /etc/nginx/sites-enabled/default
ubuntu@ip-172-31-2-249:/srv/www/app$ sudo vim /etc/nginx/sites-enabled/rails.conf
# /etc/nginx/sites-enabled/rails.conf

upstream puma {
  server 0.0.0.0:3000;
}

server {
  listen 80 default_server;
  server_name andrewsapp.app;
  root /srv/www/app/public;
  index index.html;

  location ^~ /(assets|packs)/ {
    try_files $uri @rails;
    gzip_static on;
    expires max;
    add_header Cache-Control public;
    break;
  }

  location / {
    try_files $uri @rails;
  }

  location @rails {
    proxy_set_header Host $http_host;
    proxy_set_header X-Forwarded-Host $http_host;
    proxy_set_header X-Forwarded-For $proxy_add_x_forwarded_for;
    proxy_set_header X-Forwarded-Proto $scheme;
    proxy_set_header X-Forwarded-Ssl on;
    proxy_set_header X-Forwarded-Port $server_port;
    proxy_pass http://puma;
  }
}
Let’s go through a few of these items:
- The upstream block defines a server that can be used with
proxy_pass, i.e. a web server/process to which Nginx can forward traffic. - The server block defines the listener we’re setting up here. It listens on port 80, the public HTTP port, and directs requests for static content to the “public” folder within our Rails root directory unless they are explicitly sent somewhere else.
- Requests for the contents of the assets (JS, CSS, images) and packs (JS compiled by Webpacker) directories will be served from static if available, otherwise from Rails, and will be compressed and cached.
- All other requests will be directed to the
@railslocation, which sets a few headers and then forwards traffic to the Puma server on port 3000 that we set up previously, as defined in theupstreamblock.
Now we can restart nginx:
ubuntu@ip-172-31-2-249:/srv/www/app$ sudo service nginx restart
And let’s try to visit our application, using the public IP address of the EC2 instance:
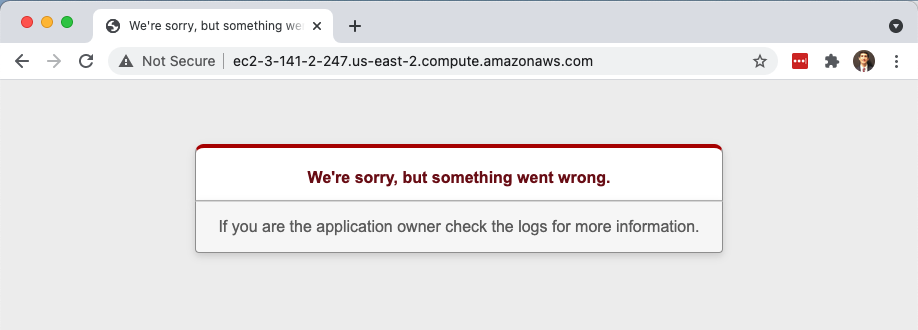
Well, errors aren’t usually the goal, but this is actually good progress! This is a Rails error page, which means we’re successfully getting through Nginx to Puma. Let’s take a look at the Rails logs to see what’s happening:
ubuntu@ip-172-31-2-249:/srv/www/app$ tail -12 log/production.log
F, [2021-04-24T18:32:46.950273 #28679] FATAL -- : [1d1e36ea-6aff-43c0-b686-82a4ebecf449]
F, [2021-04-24T18:32:46.950402 #28679] FATAL -- : [1d1e36ea-6aff-43c0-b686-82a4ebecf449] ActionView::Template::Error (The asset "application.css" is not present in the asset pipeline.
):
F, [2021-04-24T18:32:46.950603 #28679] FATAL -- : [1d1e36ea-6aff-43c0-b686-82a4ebecf449]      5:     <%= csrf_meta_tags %>
[1d1e36ea-6aff-43c0-b686-82a4ebecf449]      6:     <%= csp_meta_tag %>
[1d1e36ea-6aff-43c0-b686-82a4ebecf449]      7:
[1d1e36ea-6aff-43c0-b686-82a4ebecf449]      8:     <%= stylesheet_link_tag    'application', media: 'all', 'data-turbolinks-track': 'reload' %>
[1d1e36ea-6aff-43c0-b686-82a4ebecf449]      9:     <%= javascript_include_tag 'application', 'data-turbolinks-track': 'reload' %>
[1d1e36ea-6aff-43c0-b686-82a4ebecf449]     10:   </head>
[1d1e36ea-6aff-43c0-b686-82a4ebecf449]     11:
F, [2021-04-24T18:32:46.950738 #28679] FATAL -- : [1d1e36ea-6aff-43c0-b686-82a4ebecf449]
F, [2021-04-24T18:32:46.950871 #28679] FATAL -- : [1d1e36ea-6aff-43c0-b686-82a4ebecf449] app/views/layouts/application.html.erb:8:in `_app_views_layouts_application_html_erb___2263376107548962876_11460'
Ah! Ok, this makes sense. The key line is this one:
ActionView::Template::Error (The asset "application.css" is not present in the asset pipeline.
This means we forgot to precompile our assets, which is a necessary step in production. Let’s do that and restart Puma:
ubuntu@ip-172-31-2-249:/srv/www/app$ RAILS_ENV=production bundle exec rails assets:precompile
ubuntu@ip-172-31-2-249:/srv/www/app$ sudo service puma restart
Now let’s try our home page again:
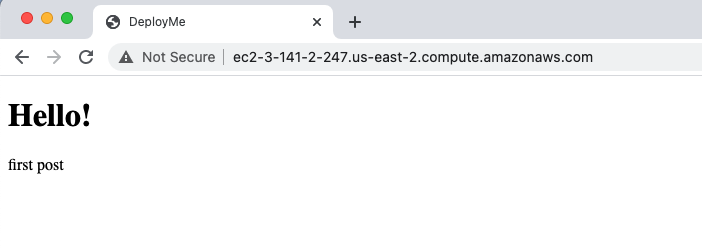
Success! We now have a publicly accessible Rails app running on an EC2 instance with Nginx and a PostgreSQL database.

Coming in part 2
Well, as usual, that got pretty long. I’ll leave it there for today. In part 2, we’ll get our site running on a custom domain and set it up with an SSL certificate so we can access it over HTTPS.